Four Tips for Painting Fall Leaves in Watercolor
 |
| Line & wash maple leaf painting |
The colours of fall are a natural inspiration for artists. The warm hues of red, orange, and yellow that blanket the ground make leaves a perfect watercolour subject. If you’re a beginner, though, painting fall leaves in watercolour can be a bit challenging. The following tips will help you avoid common issues while achieving beautiful, vibrant results in your paintings. Let’s dive into how to make your leaf paintings come to life!
1. Choose Leaves with Analogous Colors
One of the keys to success as a beginner in painting fall leaves is color choice. Leaves with analogous colors —colors that sit next to each other on the color wheel—are ideal because they blend smoothly, creating harmonious transitions. For example, red, orange, and yellow leaves are perfect for this. By contrast, leaves with complementary colors, like red and green, are trickier; when these colors mix, they can create a muddy look, which might make it harder to capture the leaf’s true vibrancy.
Maple leaves, while beautiful, often contain contrasting colors, making them a bit more challenging for beginners. Instead, start with a leaf that has shades of red, orange, and yellow for an easy blending experience. Oak leaves can be a better choice for this reason.
 |
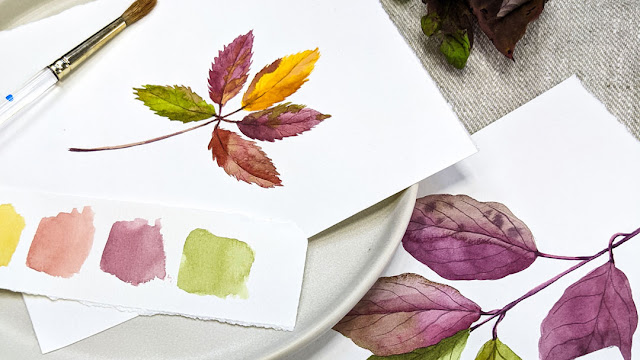
| I have kept the green and red separate on these leaves to avoid getting muddy colours |
2. Opt for a Leaf with a Smooth Margin or Gentle Lobes
Another way to simplify your painting process is to choose a leaf with smooth edges rather than serrated or jagged ones. Leaves with serrated or lobed edges, like maple leaves, blackberry leaves or horse chestnut can require more precision and brush control to capture the intricate shapes. For beginners, it’s easier to start with leaves like dogwood, arbutus, and beech, which have smoother margins or gentle lobes. These simpler edges will allow you to focus on your watercolour technique without being overwhelmed by complex details.
 |
3. Paint Half the Leaf at a Time
Water control is one of the trickiest aspects of watercolour painting, especially for larger leaves or leaves with complex shapes. To make it easier, try painting only half of the leaf at a time. The leaf’s midrib acts as a natural dividing line, allowing you to work on one side, let it dry, and then paint the other. This way, you won’t have to worry about uneven drying or colours blending too quickly. This method also lets you work at a comfortable pace, so you can achieve smoother blending and more consistent colour on each side of the leaf.
 |
| Maple leaves are large and can be tricky to paint all in one go, try one half at a time using the |
4. Use Watercolor Pencils for Fine Details
For fine details like leaf veins and midribs, watercolour pencils can be a game-changer. Once you’ve laid down your initial washes, watercolour pencils allow you to add precise lines, shading, and contrast without needing advanced brush control. You can also use them to add extra colour or darken specific areas, helping to define the leaf’s details and bring out its structure. Combining basic watercolour washes with watercolour pencils is an excellent way to build confidence, allowing you to add fine detail without relying on a steady brush alone.
 |
| My set of Derwent watercolor pencils |
Conclusion
Starting with simple shapes and colour schemes will give you the confidence to take on more complex projects as you build your watercolour skills. With these four tips, you’ll be able to capture the beauty of autumn leaves in your paintings and watch your skills blossom. So grab some vibrant leaves, and your watercolours, and begin experimenting with the captivating colours of fall!


Comments
Post a Comment